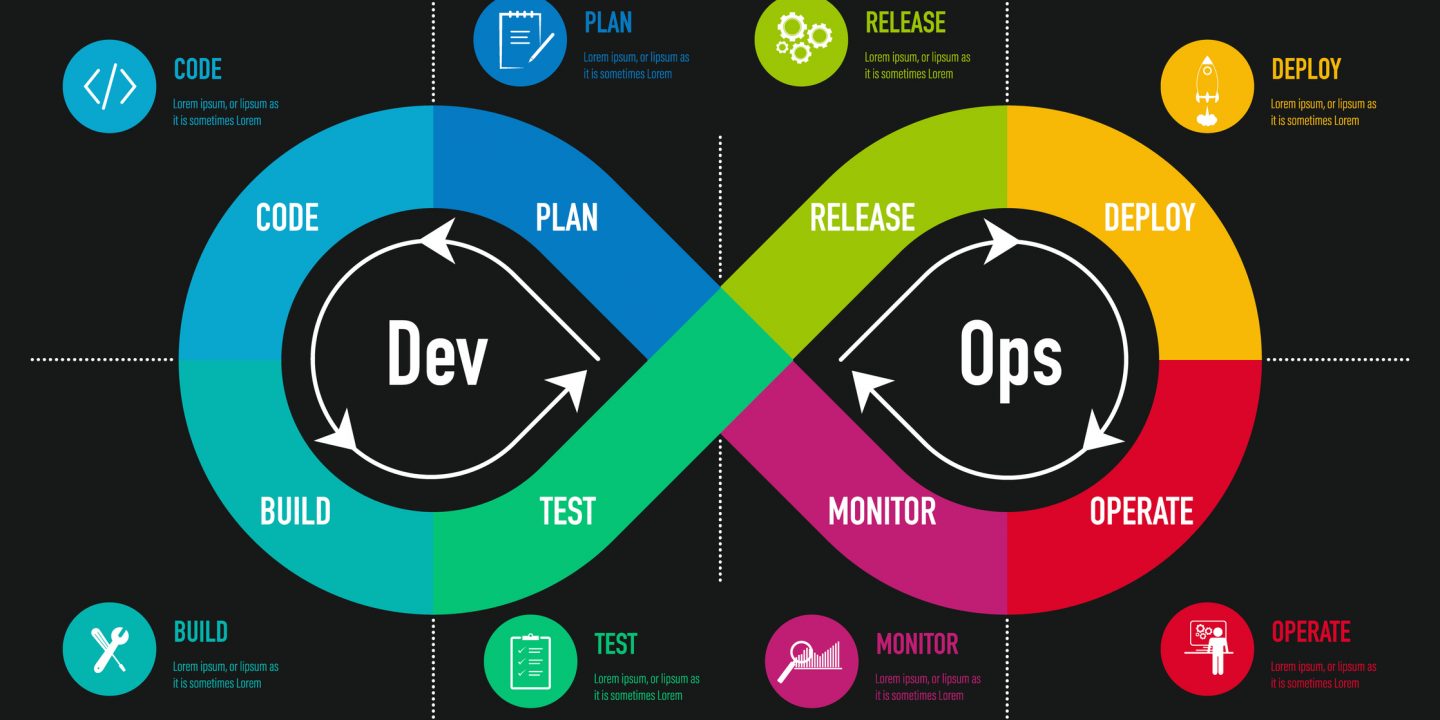
kubernetesмғҒм—җ лҸҷмһ‘н•ҳлҠ” applicationм—җ лҢҖн•ң Build лҘј мң„н•ң pipeline мһ‘м„ұл°©лІ•м—җ лҢҖн•ҳм—¬ м•Ңм•„ліҙлҸ„лЎқ н•ҳкІ мҠөлӢҲлӢӨ.
лӢӨмқҢкіј к°ҷмқҖ мғҒнҷ©мқ„ к°Җм •н•ҳкі Pipelineмқ„ мһ‘м„ұн• мҳҲм •мһ…лӢҲлӢӨ.
мҡ°м„ мІ«м§ёлЎң kubernetes мғҒм—җм„ң jenkins slaveлҘј pod нҳ•нғңлЎң лқ„мҡ°кё° мң„н•ң pipeline мқ„ мһ‘м„ұн•ҙліҙлҸ„лЎқ н•ҳкІ мҠөлӢҲлӢӨ.
podTemplate(label: 'jenkins-slave-pod',
  containers: [
    containerTemplate(
      name: 'git',
      image: 'alpine/git',
      command: 'cat',
      ttyEnabled: true
    ),
    containerTemplate(
      name: 'maven',
      image: 'maven:3.6.2-jdk-8',
      command: 'cat',
      ttyEnabled: true
    ),
    containerTemplate(
      name: 'node',
      image: 'node:8.16.2-alpine3.10',
      command: 'cat',
      ttyEnabled: true
    ),
    containerTemplate(
      name: 'docker',
      image: 'docker',
      command: 'cat',
      ttyEnabled: true
    ),
  ],
  volumes: [
    hostPathVolume(mountPath: '/var/run/docker.sock', hostPath: '/var/run/docker.sock'),
  ]
)м•һм„ң к°Җм •н–ҲлҚҳ react лҘј мң„н•ң nodeмҷҖ maven к°ңл°ңнҷҳкІҪмқ„ мӮ¬мҡ©н• мҲҳ мһҲлҠ” maven, к·ёлҰ¬кі docker commandлҘј мқҙмҡ©н•ҳм—¬ build, push н• мҲҳ мһҲлҠ” docker imageлҘј м§Җм •н•ҳм—¬ мӮ¬мҡ©н• мҲҳ мһҲлҠ” нҷҳкІҪмқ„ kubernetes мғҒм—җм„ң мӨҖ비н•ҳкІҢ лҗ©лӢҲлӢӨ.
лҳҗн•ң volumes н•ӯлӘ©м—җм„ң ліјмҲҳ мһҲл“Ҝмқҙ containerм—җ docker engineмқ„ 추к°ҖлЎң м„Өм№ҳ л°Ҹ кө¬лҸҷн•ҳм—¬ м—°кІ°н•ҳлҠ” л°©мӢқмқҙ м•„лӢҢ hostмқҳ docker к·ёлҢҖлЎң мӮ¬мҡ©н•ҳлҠ” л°©мӢқмқ„ мӮ¬мҡ©н•©лӢҲлӢӨ.
м°ёкі лЎң label(ex. jenkins-slave-pod)мқҳ кІҪмҡ° н–Ҙнӣ„ step мғҒм—җм„ң лҸҷмқјн•ң valueлЎң мӮ¬мҡ©лҗҳм–ҙм ём•ј н•©лӢҲлӢӨ.
лӢӨмқҢл§ҒнҒ¬лҘј нҶөн•ҙ мўҖлҚ” мғҒм„ён•ң podTemplate мӮ¬мҡ©лІ•мқ„ нҷ•мқён•ҙліј мҲҳ мһҲмҠөлӢҲлӢӨ.
мқҙнӣ„ мң„м—җм„ң м§Җм •н–ҲлҚҳ imageлі„лЎң мҲҳн–үн• build лӘ…л №м–ҙл“Өм—җ лҢҖн•ң pipelineмқ„ мһ‘м„ұн•ҙліҙлҸ„лЎқ н•ҳкІ мҠөлӢҲлӢӨ.
{
    node('jenkins-slave-pod') {
        def registry = "192.168.194.129:5000"
        def registryCredential = "nexus3-docker-registry"

        stage('Clone repository') {
            container('git') {
                // https://gitlab.com/gitlab-org/gitlab-foss/issues/38910
                checkout([$class: 'GitSCM',
                    branches: [[name: '*/dockerizing']],
                    userRemoteConfigs: [
                        [url: 'http://192.168.194.132/root/sampleapp.git', credentialsId: 'gitlab-account']
                    ],
                ])
            }
        }

        stage('build the source code via npm') {
            container('node') {
                sh 'cd frontend && npm install && npm run build:production'
            }
        }

        stage('build the source code via maven') {
            container('maven') {
                sh 'mvn package'
                sh 'bash build.sh'
            }
        }

        stage('Build docker image') {
            container('docker') {
                withDockerRegistry([ credentialsId: "$registryCredential", url: "http://$registry" ]) {
                    sh "docker build -t $registry/sampleapp:1.0 -f ./Dockerfile ."
                }
            }
        }

        stage('Push docker image') {
            container('docker') {
                withDockerRegistry([ credentialsId: "$registryCredential", url: "http://$registry" ]) {
                    docker.image("$registry/sampleapp:1.0").push()
                }
            }
        }
    }
}
мң„ pipelineмқ„ мўҖлҚ” мғҒм„ёнһҲ ліҙлҸ„лЎқ н•ҳкІ мҠөлӢҲлӢӨ.
лЁјм Җ, git clone 진н–ү кіјм •мқ„ лӢҙмқҖ pipeline мһ…лӢҲлӢӨ.
stage('Clone repository') {
    container('git') {
        // https://gitlab.com/gitlab-org/gitlab-foss/issues/38910
        checkout([$class: 'GitSCM',
            branches: [[name: '*/dockerizing']],
            userRemoteConfigs: [
                [url: 'http://192.168.194.132/root/sampleapp.git', credentialsId: 'gitlab-account']
            ],
        ])
    }
}branchesлҘј мӮ¬мҡ©н•ҳм—¬ м§Җм •лҗң branchлҘј к°Җм ёмҳӨкІҢ н• мҲҳ мһҲмҠөлӢҲлӢӨ.
UserRemoteConfigsлҘј нҶөн•ҙ url л°Ҹ мқёмҰқм •ліҙлҘј м§Җм •н• мҲҳ мһҲмңјл©° м§Җм •лҗң мқёмҰқм •ліҙлҠ” Jenkins Credential IDлЎң мӮ¬м „м—җ м§Җм •н•ҙлҶ“мқҖ ID/PasswordлҘј нҷңмҡ©н•ң л°©мӢқмһ…лӢҲлӢӨ.
к·ё мҷём—җлҸ„ submodule кҙҖл Ё мӮ¬н•ӯ л°Ҹ timeout м„Өм •л“ұ м•„лһҳ л§ҒнҒ¬м—җ лӢӨм–‘н•ң мҳөм…ҳ м •ліҙк°Җ мЎҙмһ¬н•ҳлӢҲ н•ҙлӢ№ мҳөм…ҳмқ„ нҷңмҡ©н•ҳм—¬ мўҖлҚ” мӮ¬мҡ©мһҗ мһ…л§ӣм—җ л§һ추м–ҙ мһ‘м„ұмқҙ к°ҖлҠҘн•©лӢҲлӢӨ.
лӢӨмқҢмңјлЎңлҠ” м•һм„ң м§Җм •н–ҲлҚҳ imageмқё node, maven мқҙлҜём§ҖлҘј нҷңмҡ©н•ң Build кіјм •м—җ лҢҖн•ң pipelineмһ…лӢҲлӢӨ.
stage('build the source code via npm') {
    container('node') {
        sh 'cd frontend && npm install && npm run build:production'
    }
}

stage('build the source code via maven') {
    container('maven') {
        sh 'mvn package'
        sh 'bash build.sh'
    }
}н•ҙлӢ№ pipelineмқҳ кІҪмҡ° sh(shell script)мқ„ мӮ¬мҡ©н•ҳлҠ” л°©мӢқмңјлЎң кё°мЎҙм—җ мӮ¬мҡ©н•ҳлҚҳ build commandлҘј к·ёлҢҖлЎң мӮ¬мҡ©н•ҳл©ҙ лҗ©лӢҲлӢӨ.
мқҙнӣ„ docker commandлҘј мқҙмҡ©н•ң docker image build мҷҖ docker image push кіјм •мқ„ лӢҙмқҖ pipelineмһ…лӢҲлӢӨ.
stage('Build docker image') {
    container('docker') {
        withDockerRegistry([ credentialsId: "$registryCredential", url: "http://$registry" ]) {
            sh "docker build -t $registry/sampleapp:1.0 -f ./Dockerfile ."
        }
    }
}

stage('Push docker image') {
    container('docker') {
        withDockerRegistry([ credentialsId: "$registryCredential", url: "http://$registry" ]) {
            docker.image("$registry/sampleapp:1.0").push()
        }
    }
}м•„лһҳмҷҖ к°ҷмқҙ м•һм„ң м§Җм •н–ҲлҚҳ registry м •ліҙлҘј нҷңмҡ©н•ҳм—¬ docker imageм—җ лҢҖн•ң build л°Ҹ pushлҘј 진н–үн•©лӢҲлӢӨ.
м—¬кё°м„ңлҠ” м§Ғм ‘ кө¬м¶•н•ң NexusлҘј нҷңмҡ©н•ҳм—¬ docker imageлҘј м§Җм •н•ҳлҠ” л°©мӢқмқ„ мӮ¬мҡ©н•ҳкі мһҲкё° л•Ңл¬ём—җ withDockerRegistryлҘј нҶөн•ҙ мқёмҰқм •ліҙлҘј нҷңмҡ©н•ҳм—¬ м—°кІ°лҗҳм–ҙм§ҖлҸ„лЎқ н•©лӢҲлӢӨ.
(м—¬кё°м„ң мӮ¬мҡ©н•ң nexus3-docker-registry лҳҗн•ң Jenkins Credential IDлЎң мӮ¬м „м—җ мғқм„ұн•ҙ лҶ“м•ҳмҠөлӢҲлӢӨ.)
def registry = "192.168.194.129:5000"
def registryCredential = "nexus3-docker-registry"
withDockerRegistry кҙҖл Ёлҗң м •ліҙлҠ” лӢӨмқҢл§ҒнҒ¬лҘј м°ёмЎ°н•©лӢҲлӢӨ.
мөңмў…м ҒмңјлЎң м•„лһҳмҷҖ к°ҷмқҖ pipeline мқҙ л§Ңл“Өм–ҙм§ҖкІҢ лҗ©лӢҲлӢӨ.
podTemplate(label: 'jenkins-slave-pod',
  containers: [
    containerTemplate(
      name: 'git',
      image: 'alpine/git',
      command: 'cat',
      ttyEnabled: true
    ),
    containerTemplate(
      name: 'maven',
      image: 'maven:3.6.2-jdk-8',
      command: 'cat',
      ttyEnabled: true
    ),
    containerTemplate(
      name: 'node',
      image: 'node:8.16.2-alpine3.10',
      command: 'cat',
      ttyEnabled: true
    ),
    containerTemplate(
      name: 'docker',
      image: 'docker',
      command: 'cat',
      ttyEnabled: true
    ),
  ],
  volumes: [
    hostPathVolume(mountPath: '/var/run/docker.sock', hostPath: '/var/run/docker.sock'),
  ]
)

{
    node('jenkins-slave-pod') {
        def registry = "192.168.194.129:5000"
        def registryCredential = "nexus3-docker-registry"

        // https://jenkins.io/doc/pipeline/steps/git/
        stage('Clone repository') {
            container('git') {
                // https://gitlab.com/gitlab-org/gitlab-foss/issues/38910
                checkout([$class: 'GitSCM',
                    branches: [[name: '*/dockerizing']],
                    userRemoteConfigs: [
                        [url: 'http://192.168.194.132/root/stlapp.git', credentialsId: 'jacobbaek-privategitlab']
                    ],
                ])
            }
        }

        stage('build the source code via npm') {
            container('node') {
                sh 'cd frontend && npm install && npm run build:production'
            }
        }

        stage('build the source code via maven') {
            container('maven') {
                sh 'mvn package'
                sh 'bash build.sh'
            }
        }

        stage('Build docker image') {
            container('docker') {
                withDockerRegistry([ credentialsId: "$registryCredential", url: "http://$registry" ]) {
                    sh "docker build -t $registry/stlapp:1.0 -f ./Dockerfile ."
                }
            }
        }

        stage('Push docker image') {
            container('docker') {
                withDockerRegistry([ credentialsId: "$registryCredential", url: "http://$registry" ]) {
                    docker.image("$registry/stlapp:1.0").push()
                }
            }
        }
    }
}л§Ҳм§Җл§үмңјлЎң н•ҙлӢ№ jenkins pipeline нҢҢмқјмқ„ кҙҖл Ёлҗң repositoryм—җ commit and push н•ҳм—¬ кҙҖлҰ¬н•ҳлҸ„лЎқ н•©лӢҲлӢӨ.
мң„мҷҖ к°ҷмқҙ мһ‘м„ұлҗң pipelineмқ„ JenkinsлӮҙ pipelineмңјлЎң мғқм„ұлҗң jobм—җ
м—°лҸҷмқ„ мҲҳн–үн•ҳл©ҙ pushмҷҖ к°ҷмқҖ eventк°Җ л°ңмғқлҗ л•Ңл§ҲлӢӨ мһ‘м„ұн•ң Jenkins pipelineмқ„ нҶөн•ң buildк°Җ мқҙлЈЁм–ҙм§ҖкІҢ лҗ©лӢҲлӢӨ.